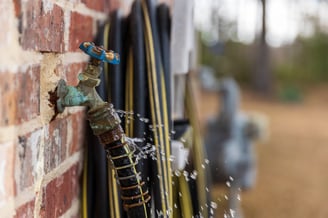
A leaky outside spigot might seem like a small issue, but it can lead to serious water waste, drive up your utility bills, and even cause damage to your foundation or siding. The good news is, most leaks are easy to diagnose and fix with a few tools and basic know-how.
Whether you call it a hose bib, spigot, or outdoor faucet, That Plumber is here to help you find the source of the leak, perform a quick outdoor faucet repair, and know when it’s time for a complete replacement. If you’d rather skip the DIY steps, fill out our online contact form to schedule fast, affordable outdoor faucet repair with That Plumber.
Step 1: Turn Off the Water Supply
Start by shutting off the water to the outdoor faucet. Most homes have an interior shut-off valve inside the basement or utility room. Turn the handle fully clockwise or move the lever perpendicular to the pipe.
Once the water’s off, open the outdoor faucet to release any remaining pressure.
Step 2: Drain the Faucet
Detach any hoses and let water drain from the faucet. This prevents splashing and makes it easier to handle fittings.
Step 3: Remove the Handle
Pop off the decorative cap (if there is one), then unscrew and remove the handle. If it’s stuck, apply a little penetrating oil and give it a few minutes to loosen. Keep all parts organized for reassembly later.
Step 4: Tighten or Remove the Packing Nut
A small leak from the handle often means the packing nut is loose. Try tightening it just a quarter-turn with a wrench. If the drip stops, you’re done.
If the leak continues, remove the nut completely so you can inspect the valve stem and internal seals.
Step 5: Inspect the Washer and Valve Stem
Pull the valve stem out and check the washer on the end. A cracked or flattened washer is one of the most common causes of a dripping outdoor faucet. Replace it, along with any worn O-rings, and add a dab of plumber’s grease.
If the valve seat inside the faucet looks corroded or pitted, you may need to replace the entire faucet.
Step 6: Reassemble and Seal Threads
Wrap Teflon tape around any threaded fittings (clockwise, two to three wraps). Reinstall the stem, tighten the packing nut, and reattach the handle. Make sure everything feels snug but not over-tightened.
Step 7: Turn On the Water and Test
Turn the water supply back on and close the faucet handle. Check for leaks around the spout, handle, and wall connection. If you still see dripping, tighten the packing nut slightly or double-check your washer replacement.
If the leak persists after these steps, the faucet body or seat is likely too damaged for repair. In this case, a full replacement is the best option. Call That Plumber for professional outdoor faucet replacement.
When to Replace Your Outdoor Faucet
Repairs are quick and affordable when the leak is minor, but replacement is often the better choice if you notice:
- Cracked faucet body or frozen threads
- Heavily corroded parts or stripped fittings
- Persistent drips even after washer replacement
- Poor water flow or a seized handle
That Plumber can replace your old hose bib with a durable, frost-proof model that prevents leaks and resists freezing temperatures.
When to Call That Plumber
If you’ve tried tightening, replacing washers, and sealing threads but the faucet still leaks, it’s time to call the experts at That Plumber. We’ll inspect your outdoor faucet, identify the root cause, and handle any repairs or replacements quickly and professionally.
We handle everything from leaky outdoor faucets and frozen spigots to main water line repairs, saving you time, water, and money. Contact That Plumber for reliable outdoor faucet repair and replacement.